Business Service Monitoring
To view or configure Business Processes in NetEye 4, click on “Business Processes” in the left navigation bar. If you haven’t yet configured any Business Processes, you will see a new Dashboard like the one in Fig. 92 with two options: “Create” and “Upload”.
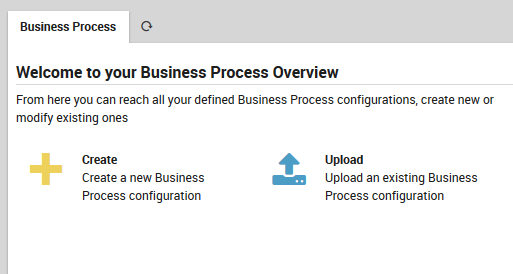
Fig. 92 The empty Business Process Overview dashboard.
Configure a new Business Process
To create a new Business Process configuration, click on the “Create” button. You should see a new dashboard panel (Fig. 93) that appears to the right of the Business Process Overview dashboard.
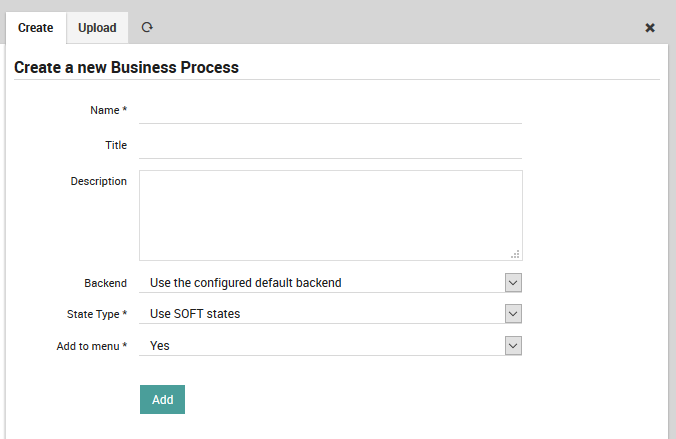
Fig. 93 The new Business Process creation panel.
You will need to fill in the following fields to create the new Business Process:
Configuration name: The Business Process definition will be stored with this name. This is going to be used when referencing this process in URLs and in Check Commands.
Title: You might optionally want to provide an additional title. In that case the title is shown in the GUI, while the name is still used as a reference. The title will default to the name.
Description: Provide a short description explaining within 100-150 character what this configuration provides. This will be shown on the Dashboard.
Backend: Icinga Web 2 currently uses only one Monitoring Backend, but in theory you could configure multiple ones. They won’t be usable in a meaningful way at the time of this writing. Still, you might want to use a different backend as a data provider for your Business Process.
Hint
Usually this should not be changed.
State Type: You can decide whether
SOFTorHARDstates should be used as a basis for calculating the state of a Business Process definition.Add to menu: Business Process configurations can be linked to the Icinga Web 2 left navigation bar. Only the first five configurations a user is allowed to see will be shown there.
Fig. 94 shows an example Business Process with the above values filled in.
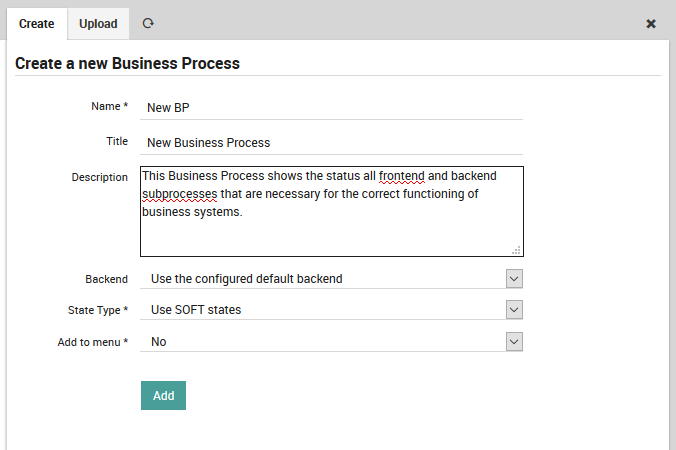
Fig. 94 The new Business Process creation panel with example values.
Store Business Process configuration
Once you are done, click Add to store your new (still empty)
Business Process configuration. The panel will show an empty “Add” tile
as in Fig. 95, ready for you to add new Business Processes.
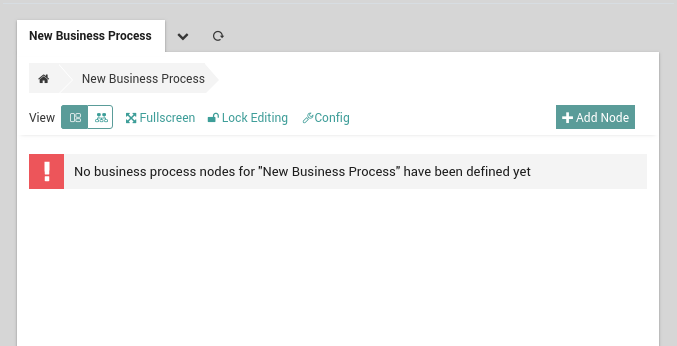
Fig. 95 The new Business Process creation panel.
From here you can now add as many deeply nested Business Processes as you want.
Create your first Business Process Node
A Business Process Node consists of a name, title, an operator and one or more child nodes. Each node can be a Root Node, a child node of other Business Process Nodes, or both. When you first create a Business Process, there will be no nodes, so you will be prompted to create one as in Fig. 96.

Fig. 96 Ready to add the first Business Process node.
Configuring Your First Node
To create our first Business Process Node, click on the Add button. You will then see the node configuration form (an asterisk indicates a required field):
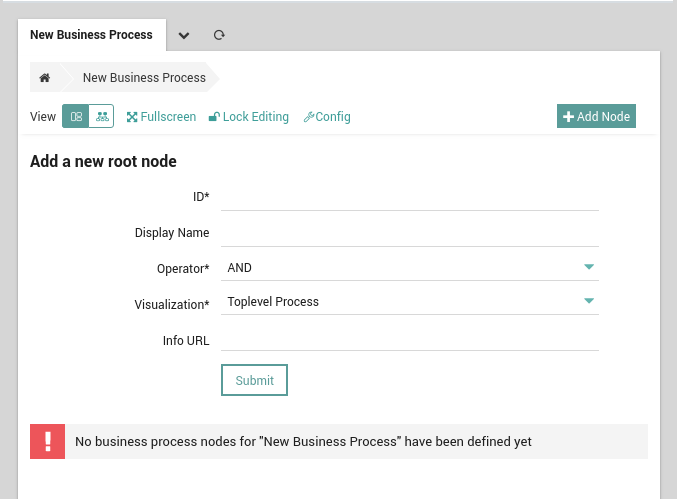
Fig. 97 The Business Process node configuration form.
Configuring a Business Process requires filling in the following fields:
Name: The first setting is the Node name, an identifier that must be unique across all nodes that will be defined. This identifier will be used within every URL and also within any Check Commands referring to this node by an Icinga Service Check.
Display Name: (Optional) As uniqueness sometimes leads to not-so-beautiful names, you can also specify a display title which will be used across all dashboards:
Operator: A Business Process’ operator defines its behavior, specifying how its own state will be calculated. It can be one of AND, OR, NOT, DEG or MIN.
Visualization: This describes when the node should be displayed. Since this node will be a root node, the form automatically suggests that you create a Toplevel Process. Alternatively, you could also create a Subprocess. As we are currently not adding this node to another node, that choice would lead to an Unbound Node that could be linked to later on.
Info URL: (Optional) You might also want to provide a link to additional information related to a specific process. This could be instructions with more technical details, or hints explaining what should happen if an outage occurs. You might not want to do so for every single node, but it might come in handy for your most important (e.g., top level or high priority) nodes.
Completed Business Process Node
That’s it, you are ready to submit the form. After clicking the green “Submit” button, you should see your first completed Business Process Node. A red notification as in Fig. 98 reminds you that your pending changes have not been stored yet.
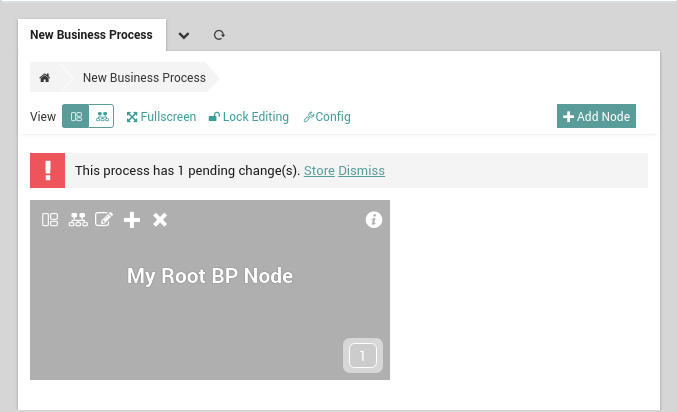
Fig. 98 The completed business process node, “My Root BP Node”.
You can now Store the Configuration as is, or move on to add additional nodes to continue your configuration. In the latter case, you will also need to select a Node type. This can be either:
Existing Process (Node): When you want to link this node to another node you have already created. Choose the appropriate existing node from the drop down list, then click the green “Submit” button. (Be sure not to link this node to itself.)
New Process Node: Here you can create a new, independent root-level node.
Host: When you have created the lowest level of intermediate nodes in your business process hierarchy, you can add the hosts that you would like to monitor as part of that business process.
Service: For each host in your business process hierarchy, you can specify particular services on the host that are part of the business process, and thus exclude other, irrelevant services on that host.
- Hosts from filter: You can select one or more hosts in a single
operation to be added to your business process, starting from a monitoring filter expression (e.g., host_name=*linux*).
- Services from filter: You can select one or more services in a single
operation to be added to your business process, starting from a monitoring filter expression (e.g., service_description=*disk*).
Note
While you can create Business Process nodes whenever you like, you cannot add Host and Service nodes until you have created the underlying hosts and services themselves. Thus you should complete that step before setting up your business process hierarchy.
To edit a node you have already created, click on the “Unlock” button and then choose the “Notepad” icon on the node you wish to change.
Note
The grey arrows below the Business Process title are breadcrumbs that show your current position. Their use is described in more detail in the official Business Process documentation.
Importing Processes
To avoid redundancy and make complex Business Process Configurations easier to maintain, it is possible to import existing business processes from other current configurations by completing the following tasks:
Create node. In order to be able to import a process, you first need to create a root node. You cannot import processes directly into the root level.
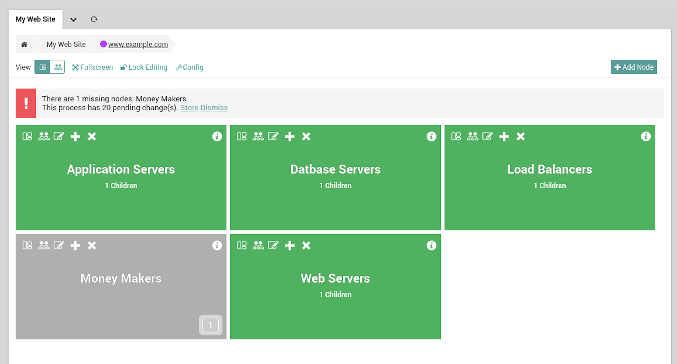
Fig. 99 Subprocesses Only
Import a Process. Once the related configuration form is open, choose Existing Process and wait for the form to refresh.

Fig. 100 Existing Process
Choose Configuration. You can now choose the configuration to import processes from. Or simply hit Next to just utilize a process from the current configuration.

Fig. 101 Choose Configuration
Select Processes. Next, select the processes you want to import and submit the form.

Fig. 102 Select Processes
Import Successful. You can now see the resulting imported process. Don’t forget to save your changes!

Fig. 103 Import Successful
Operators
Every Business Process requires an Operator. This operator defines its behaviour and specifies how its very own state is going to be calculated.
- AND
The
ANDoperator selects the WORST state of its child nodes.- OR
The
ORoperator selects the BEST state of its child nodes.- DEGRADED
The
DEGRADEDoperator behaves like anAND, but if the resulting state is CRITICAL it transforms it into a WARNING. Refer to Fig. 104 for the case-by-case analysis of the statuses.
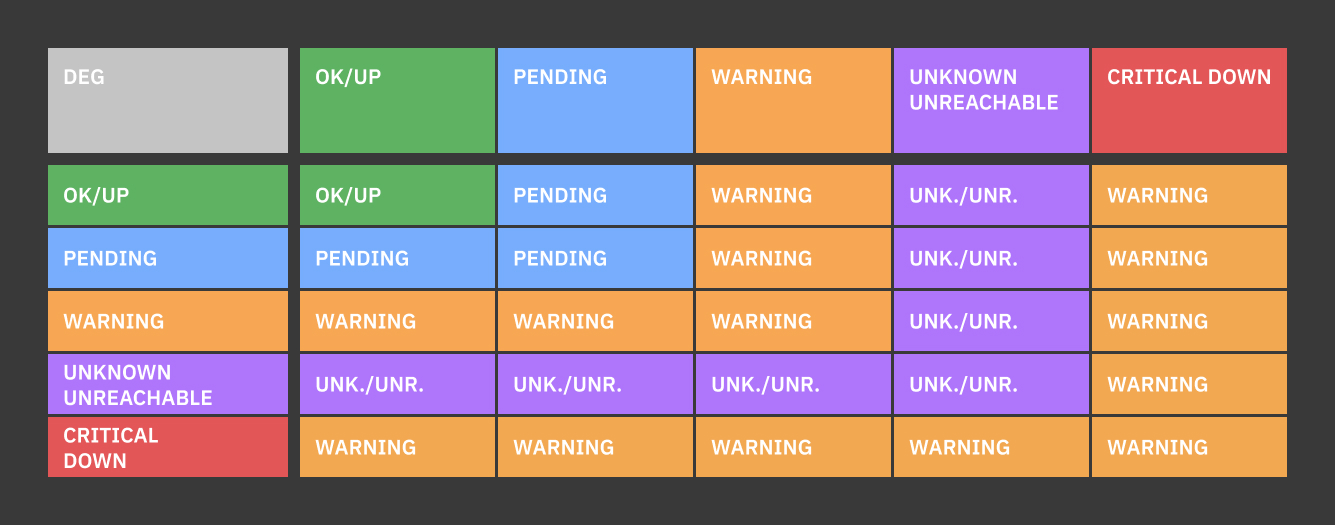
Fig. 104 All possible status outcomes when applying the DEGRADED operator.
- MIN
The
MINoperator selects the WORST state out of the BEST n child node states.

