Accessing NetEye.Cloud
This chapter explains how to access the cloud solution for customers who have an active subscription to one or more cloud services.
It provides guidance on reaching the login page and authenticating with your credentials.
NetEye.Cloud Subscription
In the cloud environment, access to NetEye.Cloud services is provided through subscriptions. Each subscription grants the right to use a specific set of services and features, tailored to your organization’s needs.
Unlike the traditional on-premises installation, where individual feature modules are to be installed and maintained separately, the Cloud solution delivers services directly through your subscription.
There’s no need to manage or deploy feature modules yourself, subscribed services are ready to use as soon as they are activated.
Due to a cross-module approach, because services run seamlessly in the cloud, you can take advantage of a fully integrated environment where features work smoothly across modules without extra setup. The contract grants access to the services you require today, and following your needs it can be expanded later, as your needs grow.
Authentication via IdP
The Cloud platform supports authentication through external Identity Providers (IdPs). An Identity Provider is a system responsible for verifying user identities and issuing authentication tokens that grant access to NetEye.Cloud services. The platform is designed to support multiple Identity Providers.
The NetEye.Cloud platform does not directly manage user passwords. Authentication is delegated to your configured Identity Provider.
During login, you should access the NetEye.Cloud Login Page and provide your email address in the authentication prompt. Based on the email domain, the platform automatically identifies the appropriate Identity Provider and redirects the authentication request accordingly.
The authentication itself takes place entirely within your Identity Provider environment. Once authentication is successfully completed, the IdP issues a token that is validated by the NetEye.Cloud platform.
Before the first login you must:
Configure your Identity Provider to allow authentication with the NetEye.Cloud platform.
Provide the necessary configuration parameters to the NetEye.Cloud Team.
Allow the NetEye.Cloud Team to complete the Identity Provider setup within the Cloud environment.
This configuration activity is typically performed once during the onboarding phase. After the integration is completed, you can authenticate using corporate credentials without any additional NetEye.Cloud-specific passwords.
Authentication via Microsoft Entra ID
The NetEye.Cloud solution uses Entra ID as one of the identity providers for user authentication.
To enable login using Microsoft Entra ID, you must create a dedicated App Registration within your Azure subscription.
This App Registration is used by the NetEye.Cloud solution to authenticate users and retrieve identity information during the login process. As part of the configuration, you must define specific Optional Claims in the access or ID token issued by Entra ID. These claims allow the NetEye.Cloud solution to obtain relevant details about the account that is logging in (such as user identity attributes required for access and authorization).
Group Claims for Authorization Management
As an optional configuration step, you may include Group Claims in the token generated by Entra ID.
When Group Claims are included:
The NetEye.Cloud solution receives information about the groups the user belongs to.
You can autonomously manage user authorization by assigning or removing users from Entra ID groups.
If Group Claims are not included:
User authorization is managed by the NetEye.Cloud team.
Any changes to user or access permissions must be requested by opening a Jira Ticket.
Note
Including Group Claims is recommended for customers who want full control over authorization management without operational dependency on the NetEye.Cloud team.
Configure EntraID on Azure
It is required to create a dedicated Azure App Registration within your own Azure subscription.
The purpose of this App Registration is to allow the NetEye.Cloud solution to trust Microsoft Entra ID as an identity provider and to retrieve the necessary identity information during user authentication. Below you will find all required steps to follow.
Note
Make sure NetEye.Cloud Team provided you with the NetEye Cloud Redirect URI. If not, you should request it.
Create a dedicated App Registration
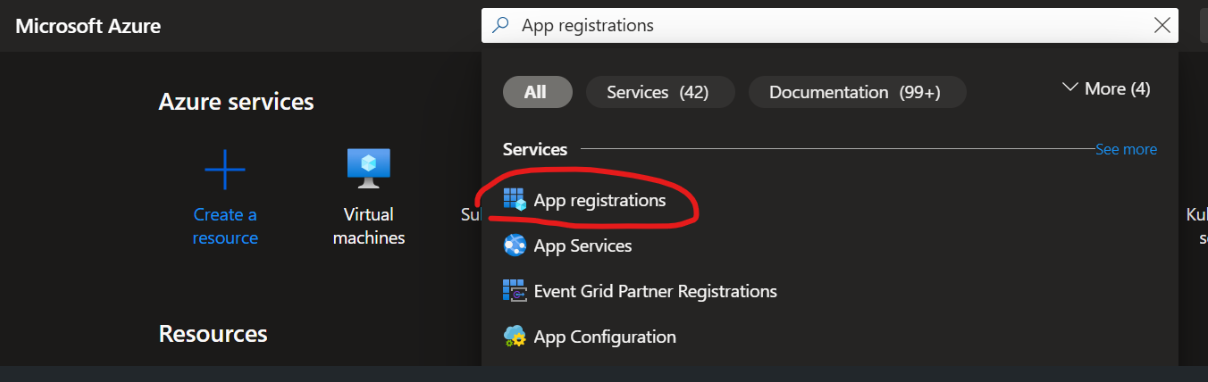
Open Azure Admin Portal (usually, go to this page)
Search and open App Registration Service
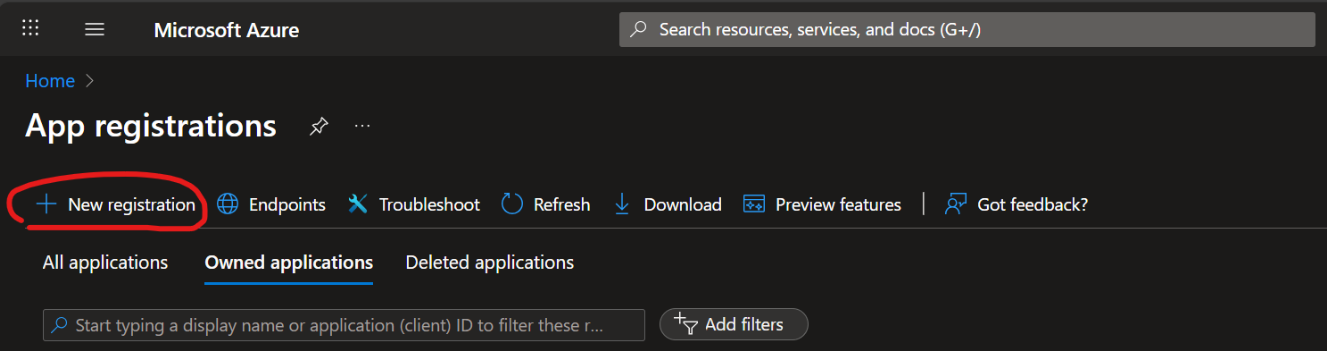
Create a new registration by clicking on New registration
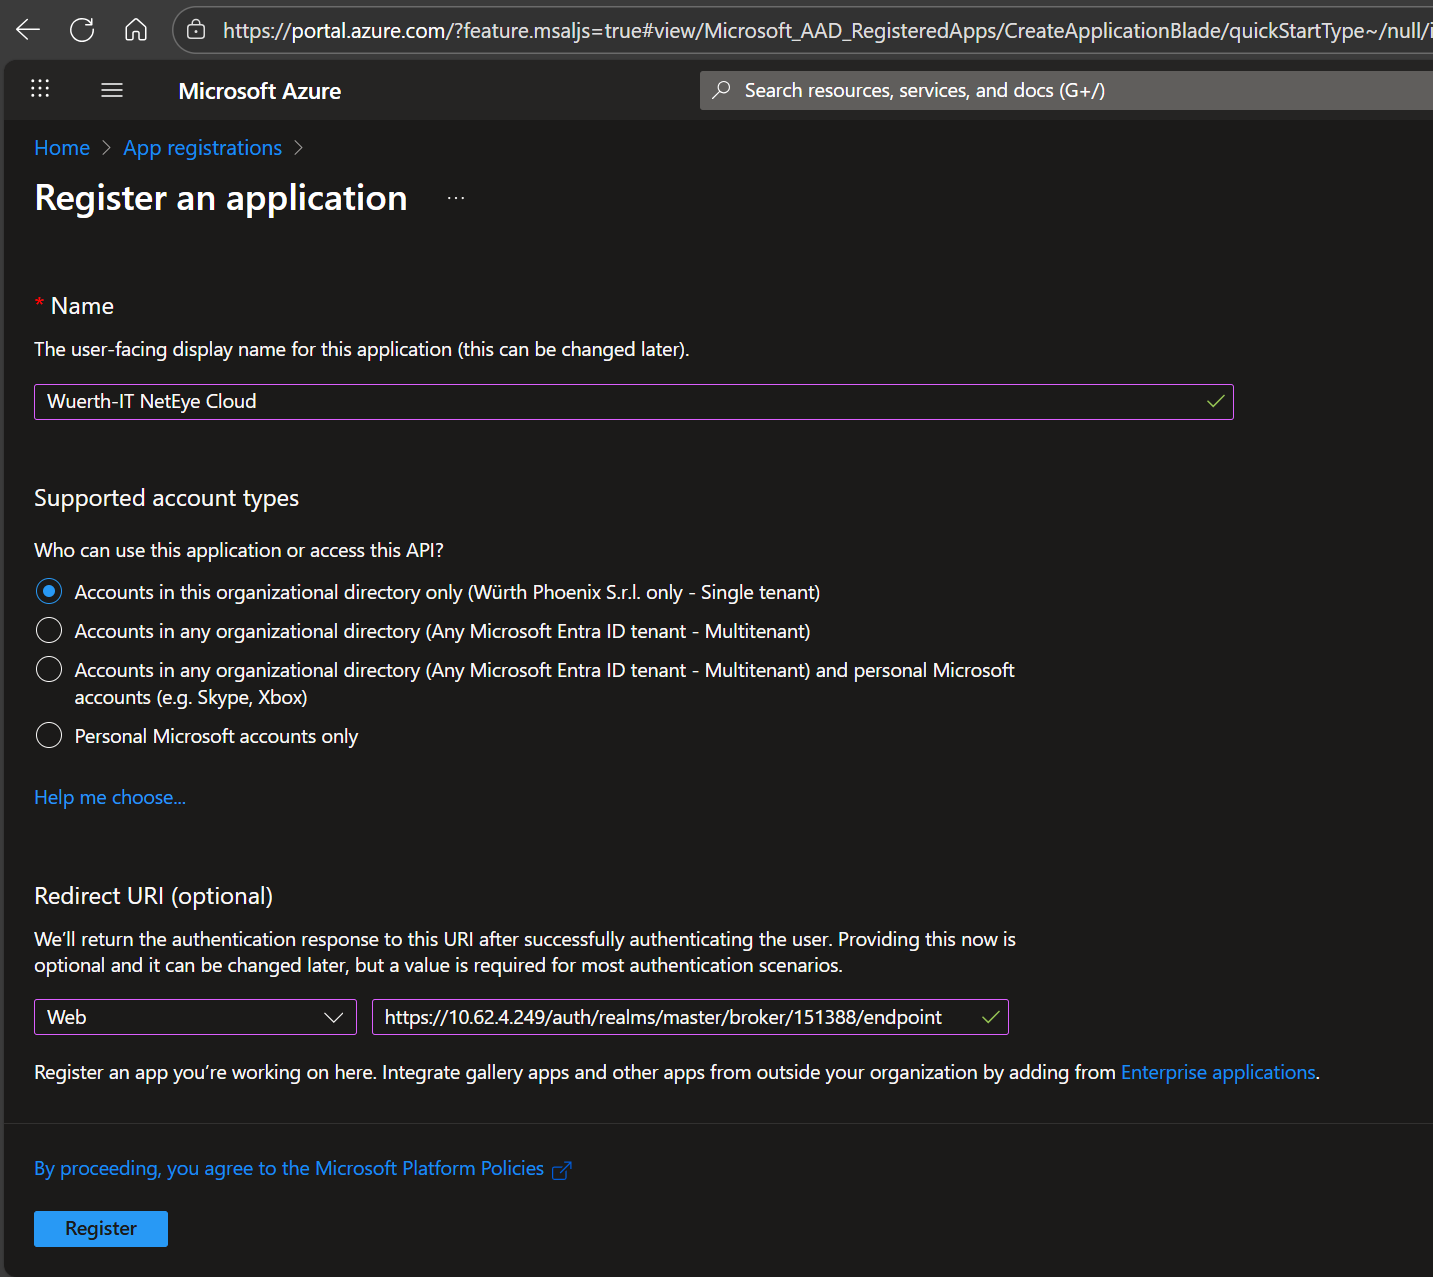
Provide basic information:
Provide a Name for the new Application (suggested: Wuerth-IT NetEye Cloud).
Select the most appropriate Account Type that is allowed to logon (if you are unsure, use Account in this organizational directory only as is the most restrictive).
As Redirect URI, select Web as Platform Type and insert the Redirect URI provided by NetEye Cloud Team.
Then, click on Register to save the new App registration
From the App Registration Overview, copy the Application (client) ID and provide it to Neteye Cloud Team.
Open the list of Endpoints by clicking on Endpoint
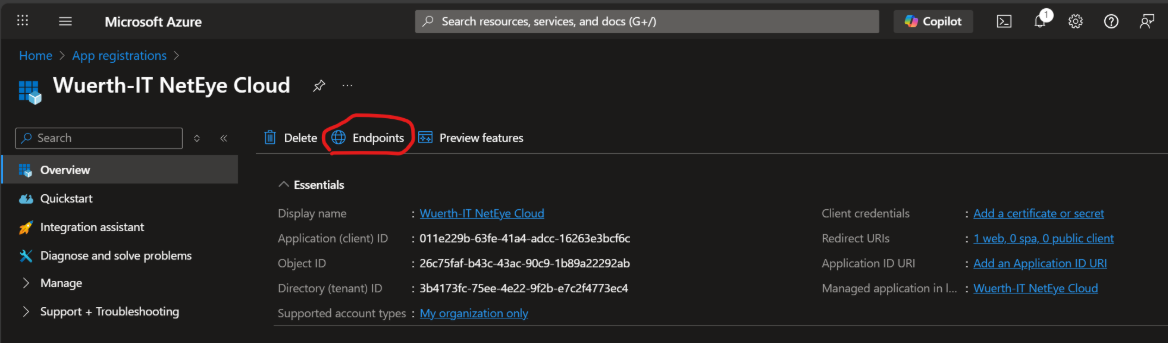
From the list of Endpoints, take note of the OpenID Connect metadata document URLs and provide it to NetEye Cloud Team.
Add Claims to EntraID Token
Warning
Optional Claims are used to map a User-friendly Attribute as the Account’s Username on NetEye.Cloud. You need to map your Email to allow Login via Email.
Note
Groups Claim is used to fully delegate Authorization to EntraID: by doing this, you can decide on your own the Access Level each Person has when logging into NetEye.Cloud by changing Group Membership on its own Identity Service. If not configured, Authorization and Access Level will be managed by Würth-IT on your behalf. In this case, changes must be requested using a Jira Ticket.
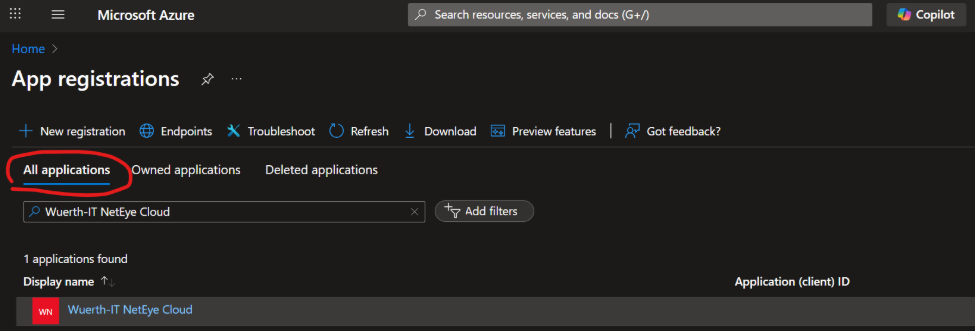
Open Azure Admin Portal (usually, go to Microsoft Azure)
Search and open App Registration Service
Go to All applications tab, search for Registration Wuerth-IT NetEye Cloud and open it
On the Left Menu, expand Manage and select Token configuration
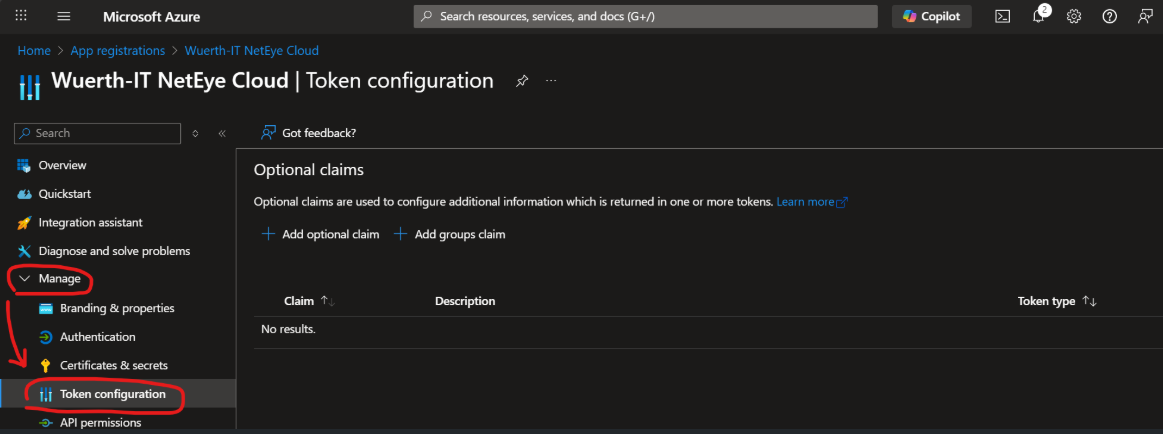
Click on Add optional claim
Select Token type ID, then flag email in the next list; confirm by clicking on Add
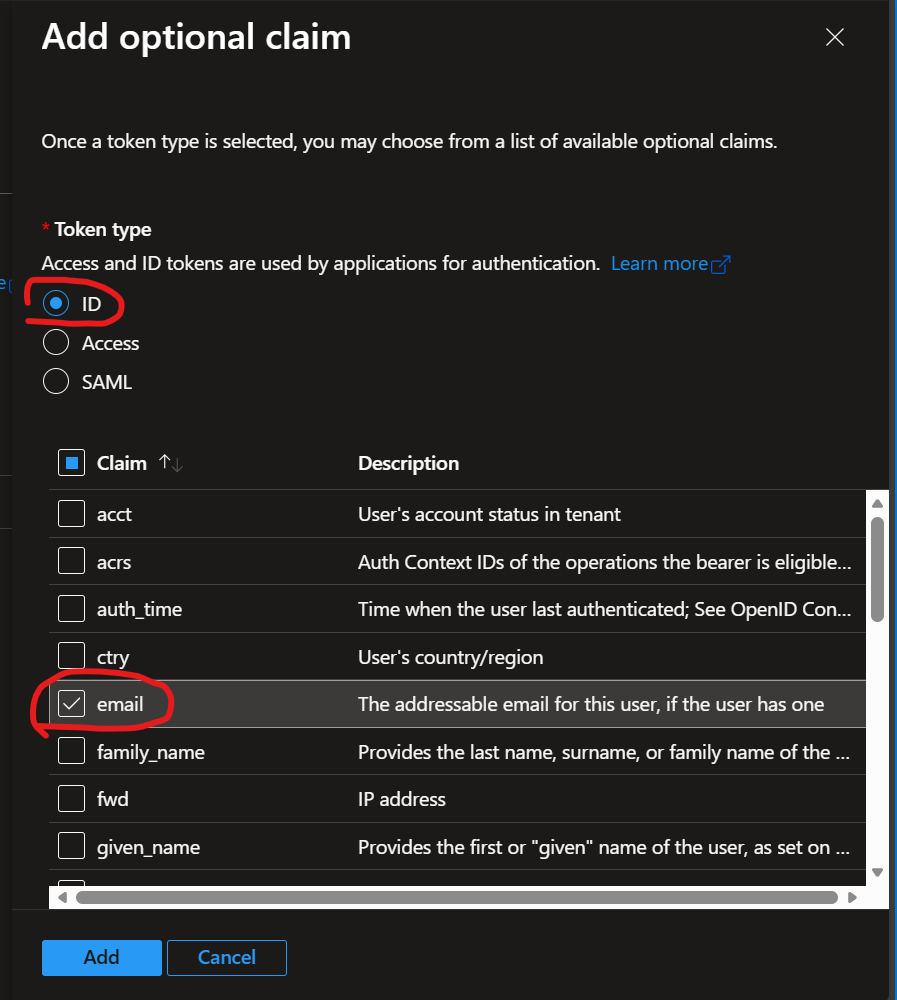
If requested, turn on the Microsoft Graph permission.
Add Optional Groups Claim
Note
You should only consider this step in case you prefer to manage Authorization on NetEye.Cloud on your own. By enabling this option, all membership of the Authenticated Account are forwarded to NetEye.Cloud.
Click on Add groups claim

Select Security groups, then select sAMAccountName for all Group types, then confirm by clicking on Add
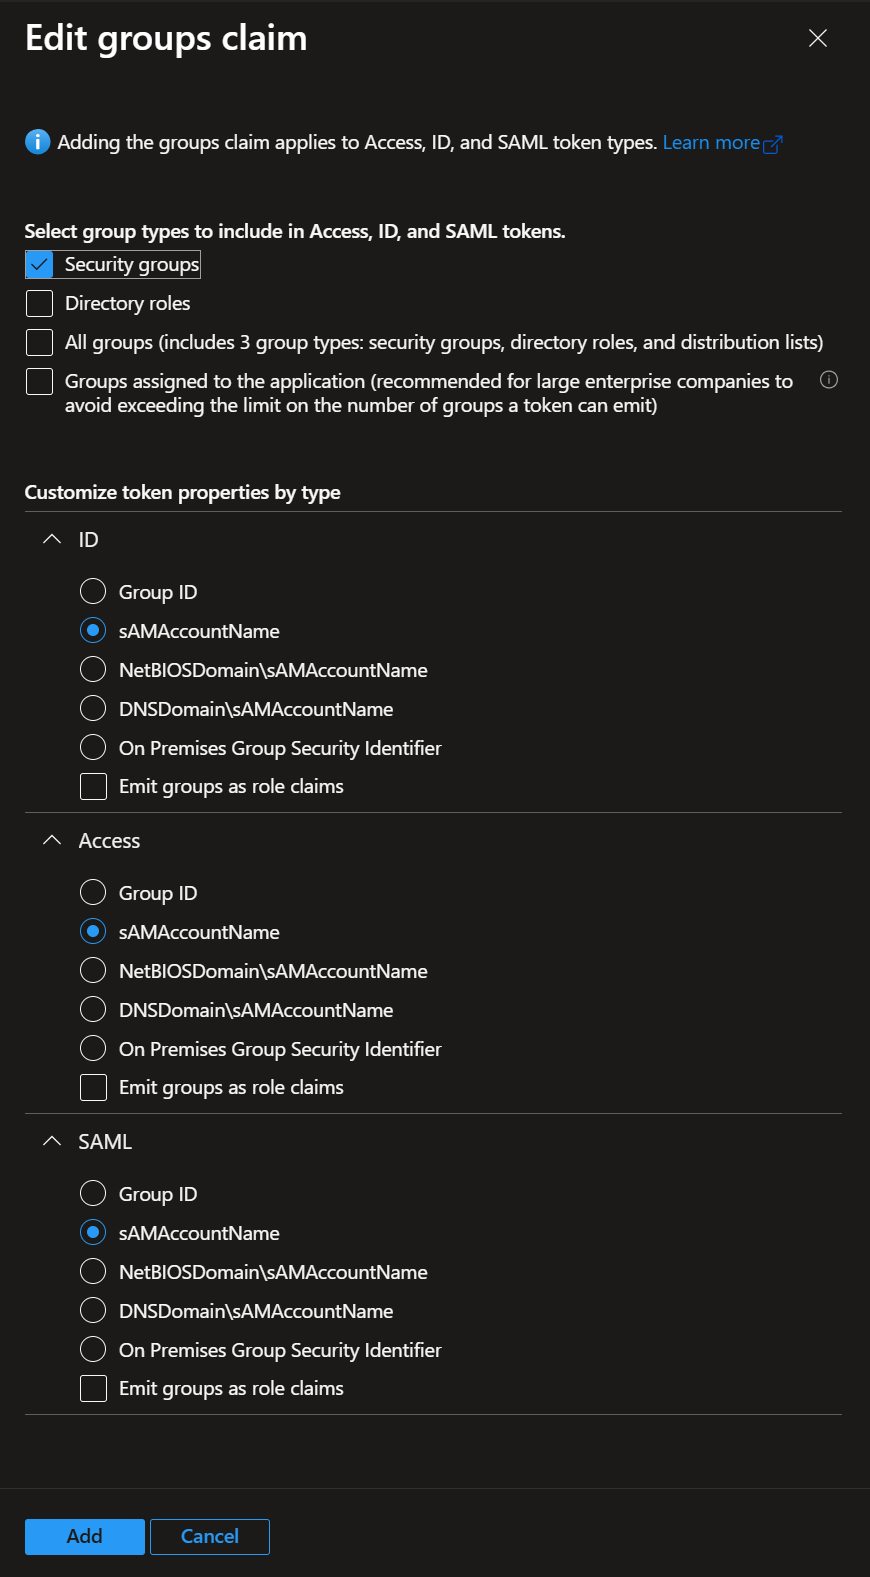
If requested, turn on the Microsoft Graph permission.
Generate Credential
Warning
The generated Credential has a Life Span. Make sure to take note of it because, when it expires, you will not be able to Login into NetEye.Cloud using your EntraID anymore.
Note
Secret’s Attributes are visible only immediately after creation. If you go to another page, you will not be able to see them anymore, so take note of them just after the creation. If you forget, just destroy and recreate the Credential.
Open Azure Admin Portal (usually, go to this page)
Search and open App Registration Service
Go to All applications tab, search for Registration Wuerth-IT NetEye Cloud and open it
On the Left Menu, expand Manage and select Certificates & secrets
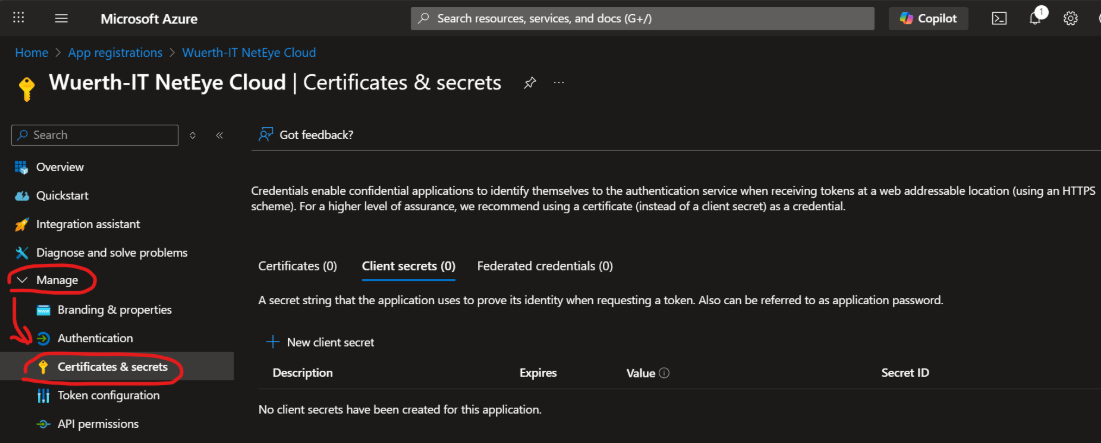
Move to Client secrets tab and create a New Client Secret by clinking on a corresponding button.
Provide a description useful for remembering in the future (suggested: NetEye Cloud OiDC Credential) and a suitable expiration date, then click on Add to store it.
Right after the Secret is created, copy Secret’s Value and provide it to NetEye.Cloud Team; Important! You will not be able to access it in the future, so take note immediately.
Final Information Review
Once the App Registration is created and configured, you must provide the NetEye.Cloud Team with the required parameters so that the identity provider can be properly configured in the NetEye.Cloud’s Keycloak instance.
At the end of this procedure, you have 4 different data that need to be provided to NetEye.Cloud Team:
Application (client) ID
OpenID Connect metadata document
Secret Value
Whether or not Groups claim will be included in the EntraID Token